I’ve noticed parents can get pretty stressed about family photos, and most of the stress seems to revolve around whether the kids are going to behave and smile for the camera. So, I thought I’d write a bit about what you can do before, during, and after your session to make sure your kids do their part and make fantastic pictures.
The real answer is super simple: don’t worry about it–let me handle that.
But that would make a really boring blog post, so here are some things you can do as a parent to make my job easier.
1. Keep the mood relaxed and positive.
You can skip the coercion and threats–that is so 1980’s! Tell your kids you’re looking forward to having a fun session and can’t wait to see what the pictures will look like. You may be a little concerned that they won’t cooperate, but it’s usually best to put your trust in your photographer and assume everything will be awesome. The kids will likely follow your lead.
Start your session with everyone as well-adjusted as possible. Nobody looks good hangry–grownup or otherwise. ‘Nuff said? Since sessions are usually in the late afternoon, it can be tempting to save up appetites for a nice dinner afterwards. For the sake of harmony, it might be better to have an early dinner/late lunch and then go out for dessert when the session’s done.
2. Follow your photographer’s lead attentively.
Adults are harder to photograph than kids. Read that again.
This counts double in family sessions. To get the most out of your session, put your attention on the photographer rather than on supervising your kids. Experienced photographers have a million strategies for making real smiles shine through. We rely on our communication with the whole family to make your images look amazing.
Even if you’re not in the shot, follow the photographer’s lead. Avoid giving instructions to your kids unless requested by the photographer. Photographers’ visions are usually a mystery until you see the images. Let the photographer set the boundaries when needed.
4. Let them be kids.
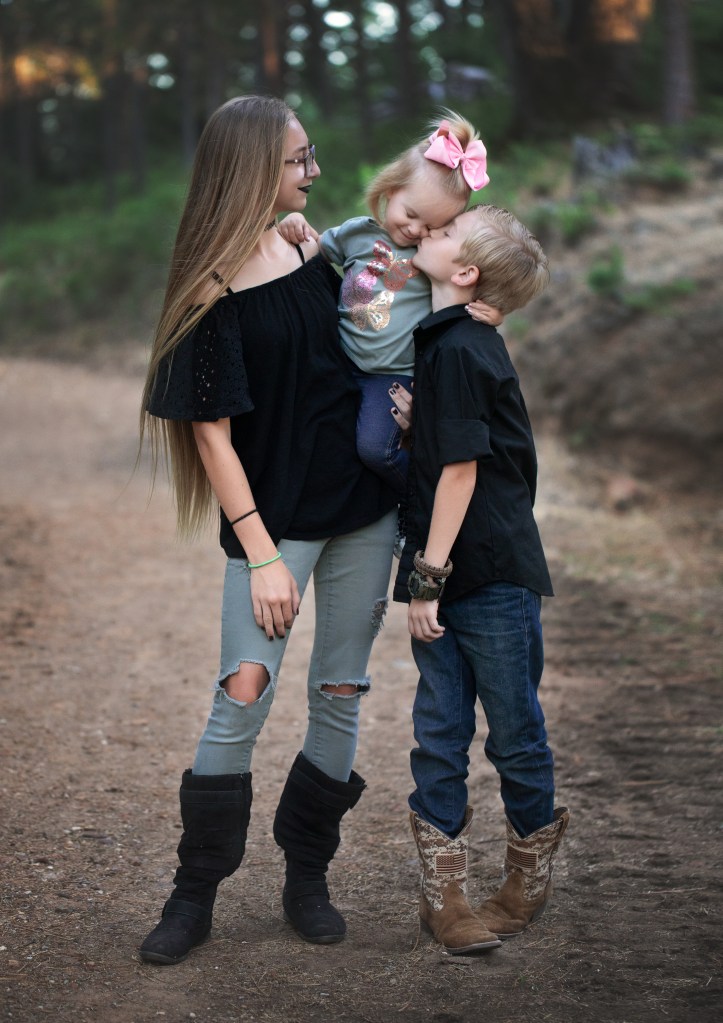
Your family portraits should be a beautiful memory of who each of you are right now at this moment in your lives. Your 3-year old is probably a goofball, and that’s ok. No, that’s better than ok–it’s fantastic. Maybe your husband is a little grumpy, for that matter. That’s ok, too. There’s nothing cuter than the moment when a goofy 3 year old forces a grudging smile out of a grumpy dad! Just let everyone be who they really are, because that’s the beauty of your family.
Nothing shuts the magic down faster than a power struggle. Even if kids are acting out a bit, it may be better to address that after the session’s over. Don’t worry about what the photographer thinks. We–for my part, anyway–aren’t looking for perfect behavior; we’re looking for personality.
3. Give it time.
Kids are always either a little wild or a little cranky when they first get out of the car. Rather than trying to force them to change their mood instantly, it works a lot better to give them some space to unwind. Let them play for a few minutes (the photographer will love getting some candid shots of them doing their own thing), and once they’ve burned off some restless energy, the posed shots will be a lot more successful.
This is why I don’t recommend mini sessions (I personally don’t offer them at all). I’ve found that the best, most authentic connections and smiles come toward the second half of my longer sessions when everyone is relaxed and natural.
5. Have fun.
Play with your kids! Mood can be contagious, so make sure yours is upbeat and relaxed. Put your worries aside. Have you ever seen an image in your photographer’s portfolio that looked like a hot mess? (If your answer is yes, consider shopping around a little more.) We’ve got you, and you’re going to love what we create.
Keep the takeaway positive as possible, even if you weren’t super impressed with your kids’ behavior. Parenting is personal, but I’d be tempted to say what happens in the photoshoot stays in the photoshoot–just let it go in the interest fostering future goodwill toward photo day. If you were relaxed and following the photographer’s lead, it’s highly unlikely anything they did will spoil your photos.
If you’re laughing and having fun with your family, you’ll bring out their lighter sides, too. Leave the stress to the professionals and enjoy this time of joy and connection.