Image resolution, aspect ratio, and file size can be confusing. This guide will use examples to help you understand what it means when a digital image has a description like “4×6 resolution” or “full resolution.” I’ll also explain how print sizes differ, and how different aspect ratios can change the look of an image.
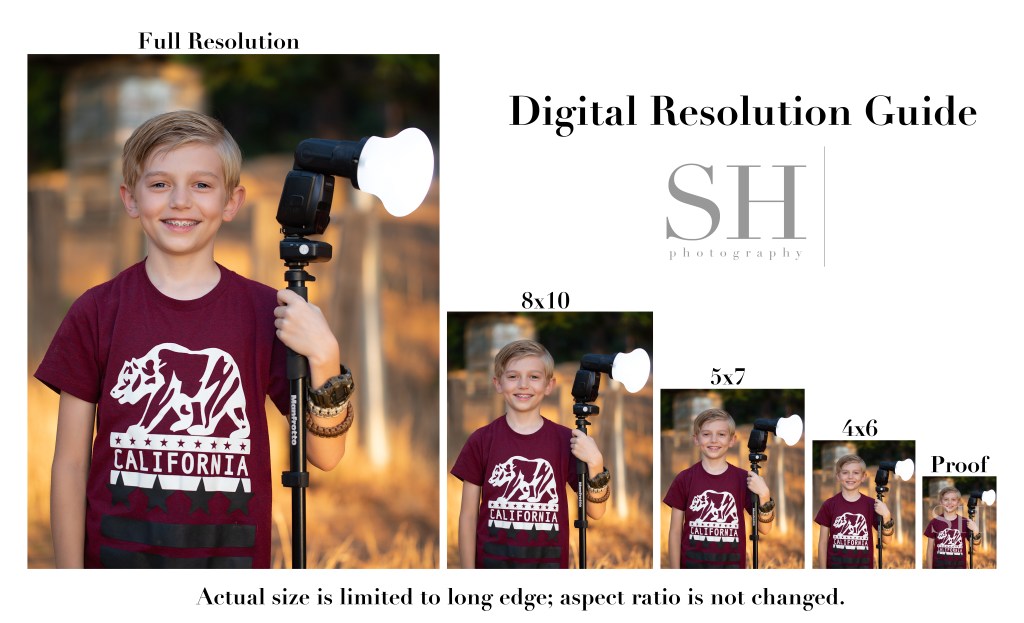
This Digital Resolution Guide shows each of the digital resolutions I offer my clients. Note that for digital files, I don’t change the shape of the image to match the exact proportions of the standard print size; I simply resize the image based on the long edge and leave the original aspect ratio (shape) intact.
Compare this to the Print Size & Ratio guide. You’ll notice that with prints, it’s not only the size, but also the shape, or aspect ratio, of the image that changes. An 8×10 print is more short and stout in shape than a 5×7, and a 4×6 is the most tall and skinny of all.
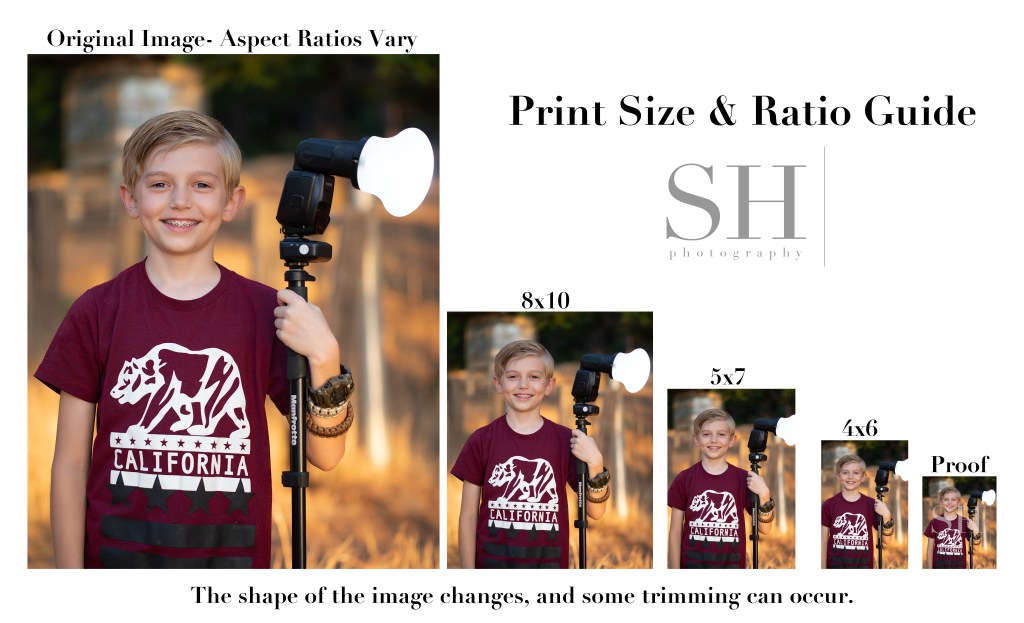
Although my camera natively shoots in a 4×6 (2×3) ratio, the actual aspect ratio of the images will vary based on how they’re finished. When printing, always check the crop of your images to make sure the necessary trimming looks ok. You might need to choose a different size print to get the best look from your image.
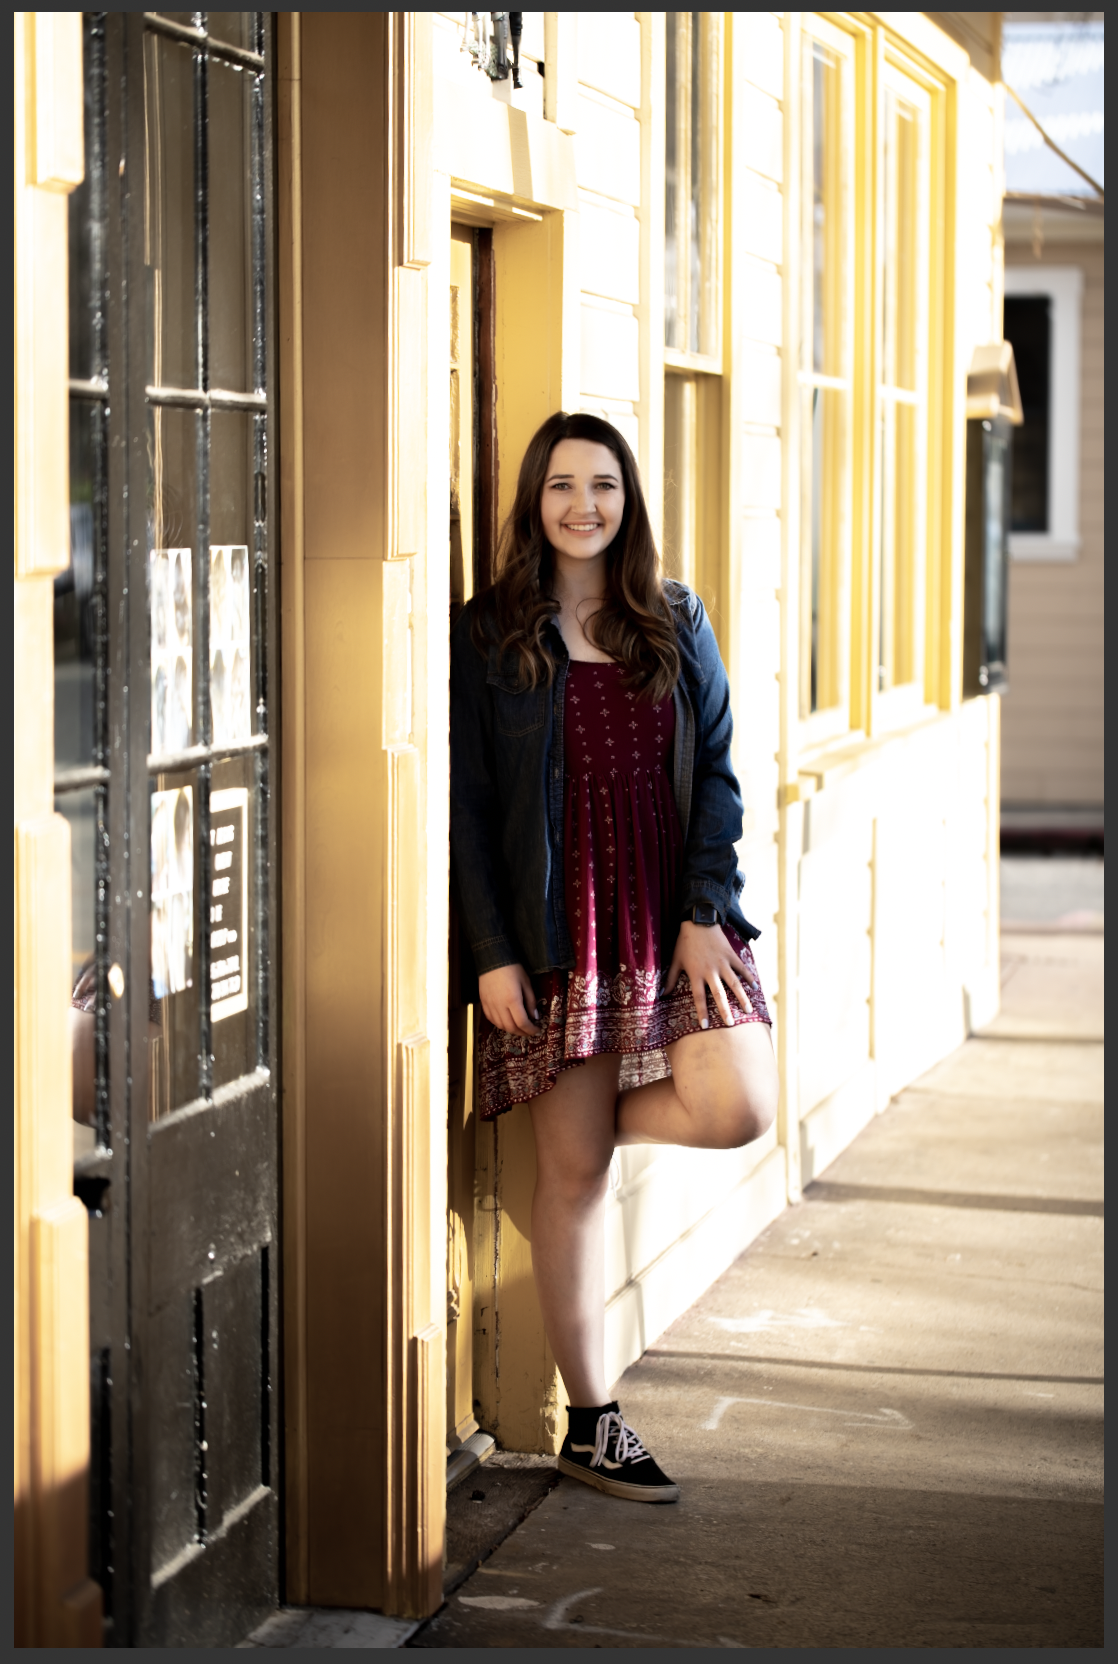
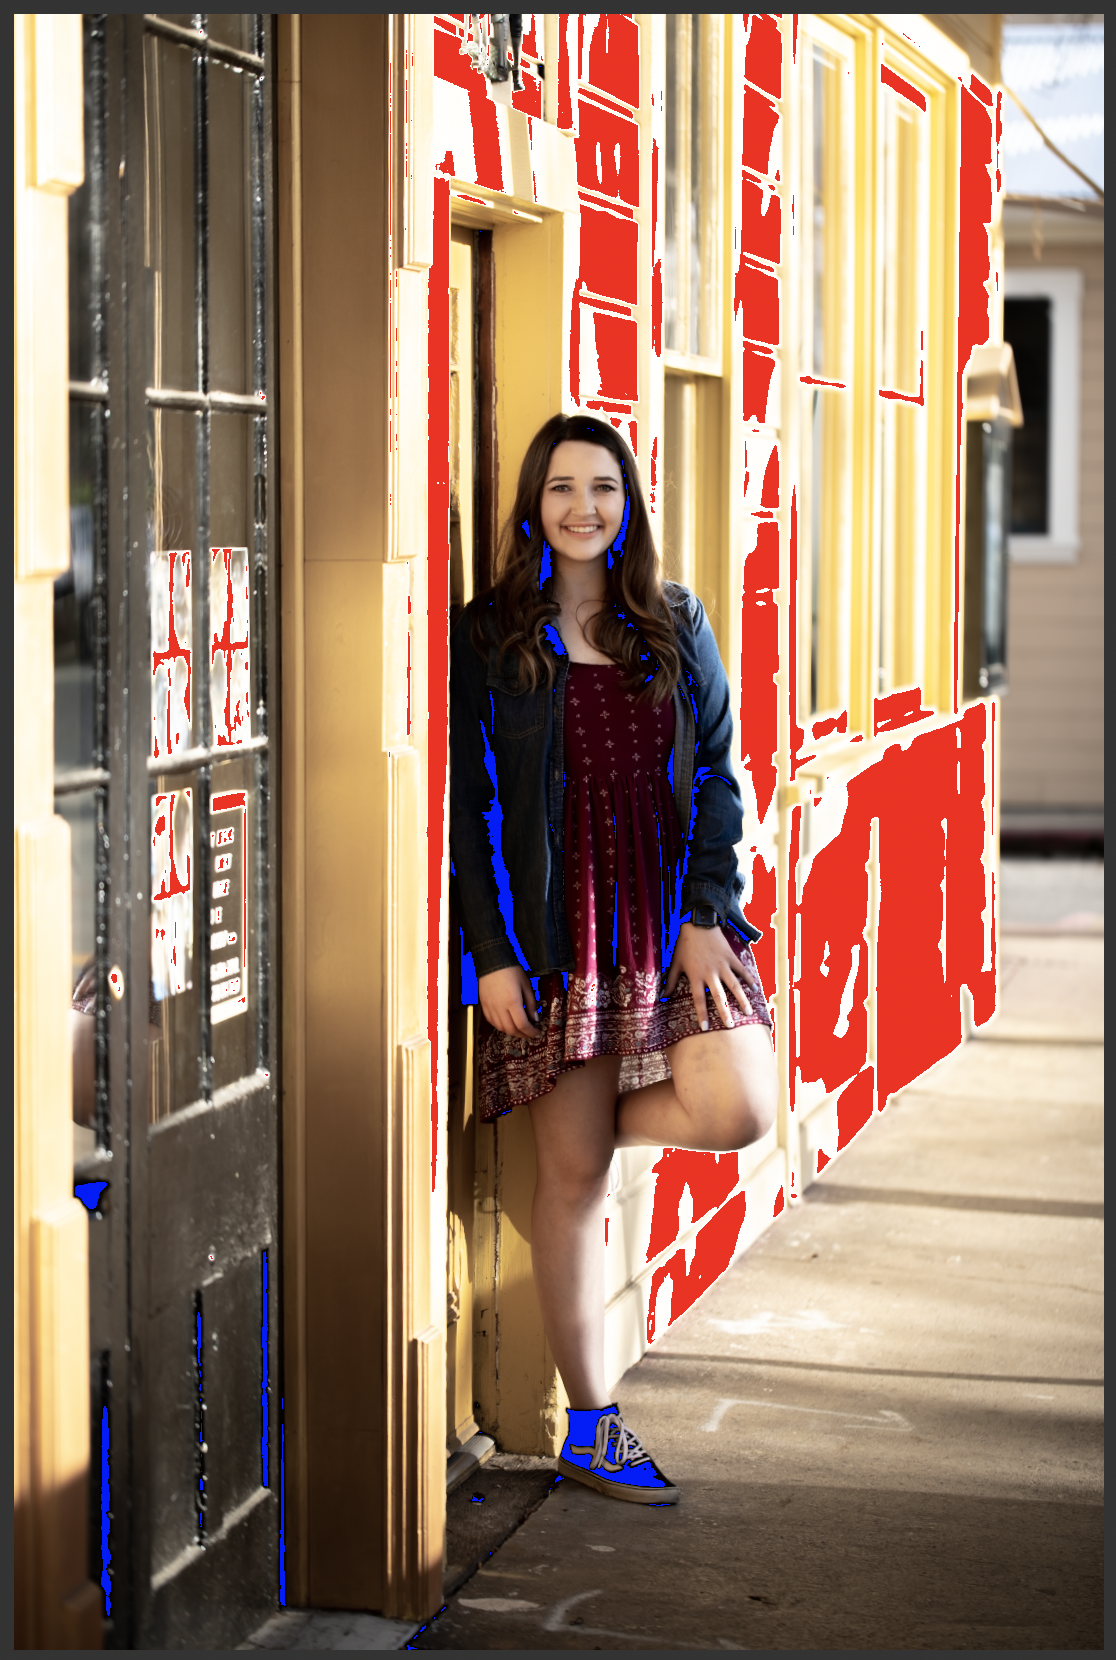
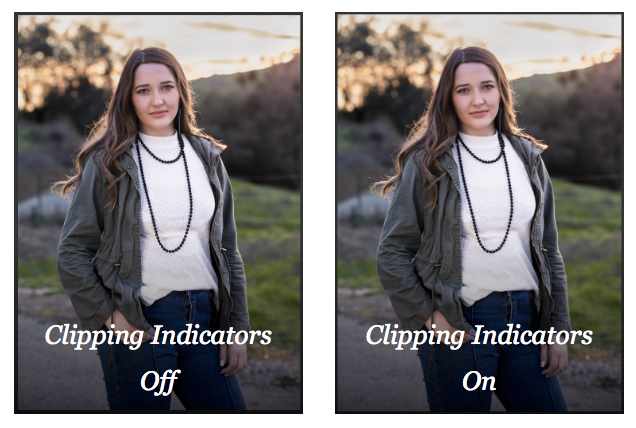
The proofs you see in my proofing galleries are the smallest versions of all–just about 18% of the original file size. Low-resolution proofs allow clients to preview their images before purchase while protecting my investment in my work. Here’s a direct comparison of a proof and a full-resolution image.

Can you even find that tiny proof in there?! It’s right below the flash on the right.
This really shows the staggering difference in quality between the different image resolutions. 4×6 digitals are about 25% original size; 5×7 are about 35%; and 8×10 are about 50%. Full resolution images print beautifully at any size, and still look impeccable at 100% zoom. They preserve every detail exactly the way it was finished in my studio.